This forms one of a series of guides on how to download DNA data from one website and upload it to another. When I say "DNA data" I mean your raw DNA data file, not a file of your matches, that is something quite different. You may want to download your raw DNA file to make the most of offers from other websites, e.g. My Heritage, to upload the data there for free and get more matches.
Please make sure that YOU are happy with any terms and conditions and privacy policies before proceeding through the various screens.
There are two parts to this article:
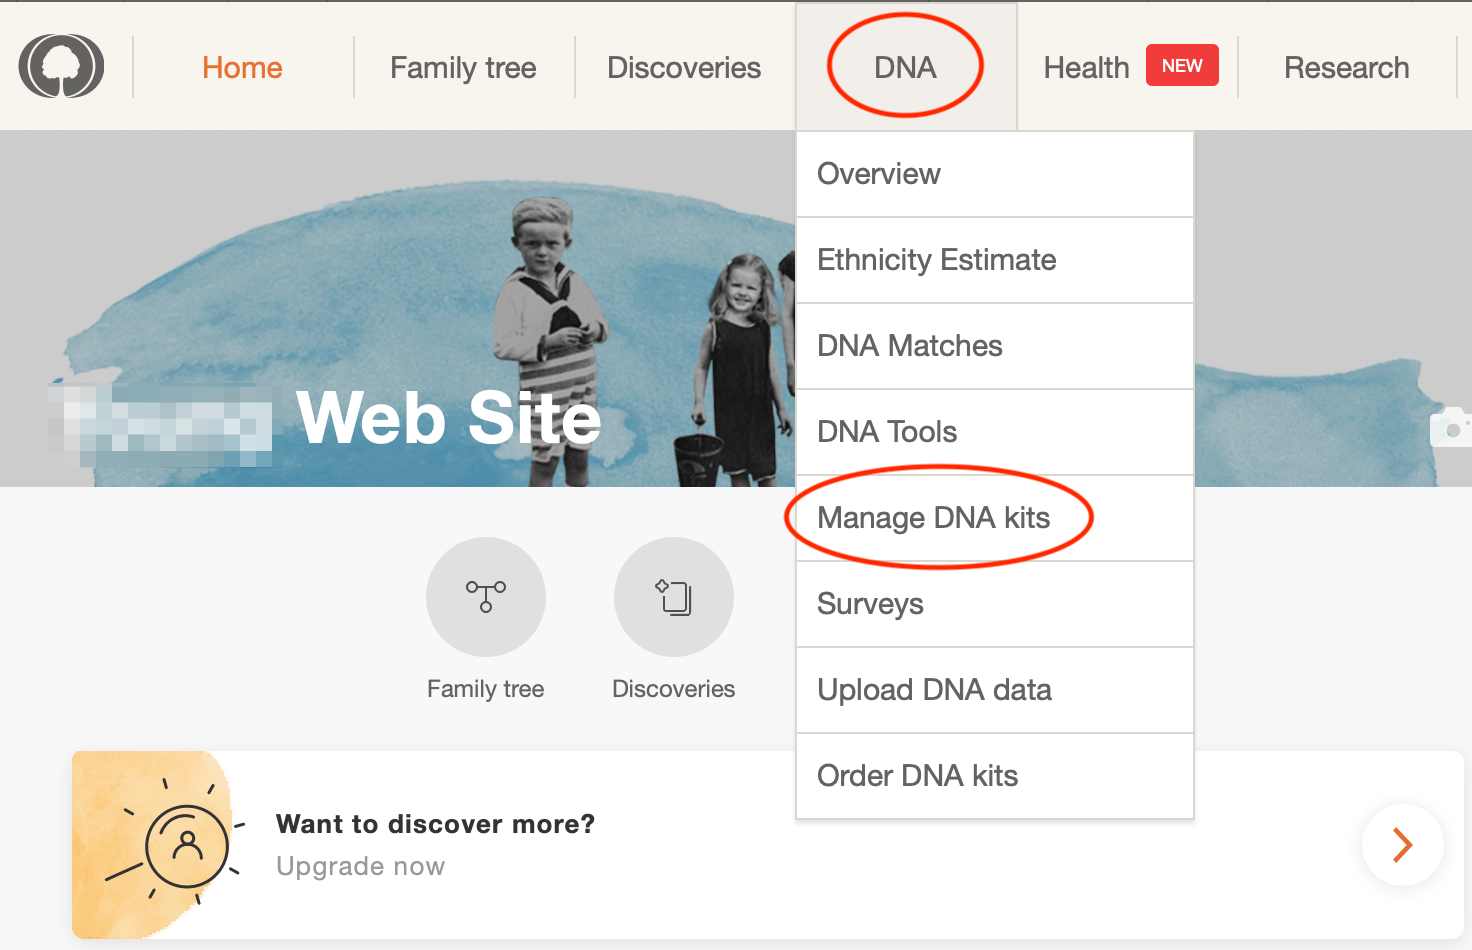
STEP (1): Log in to your My Heritage account and click on the “DNA” tab at the top of the screen, and then “Manage DNA kits”.
STEP (2): Click on the three dots at the end of the row for the kit of interest and then “Download kit”.
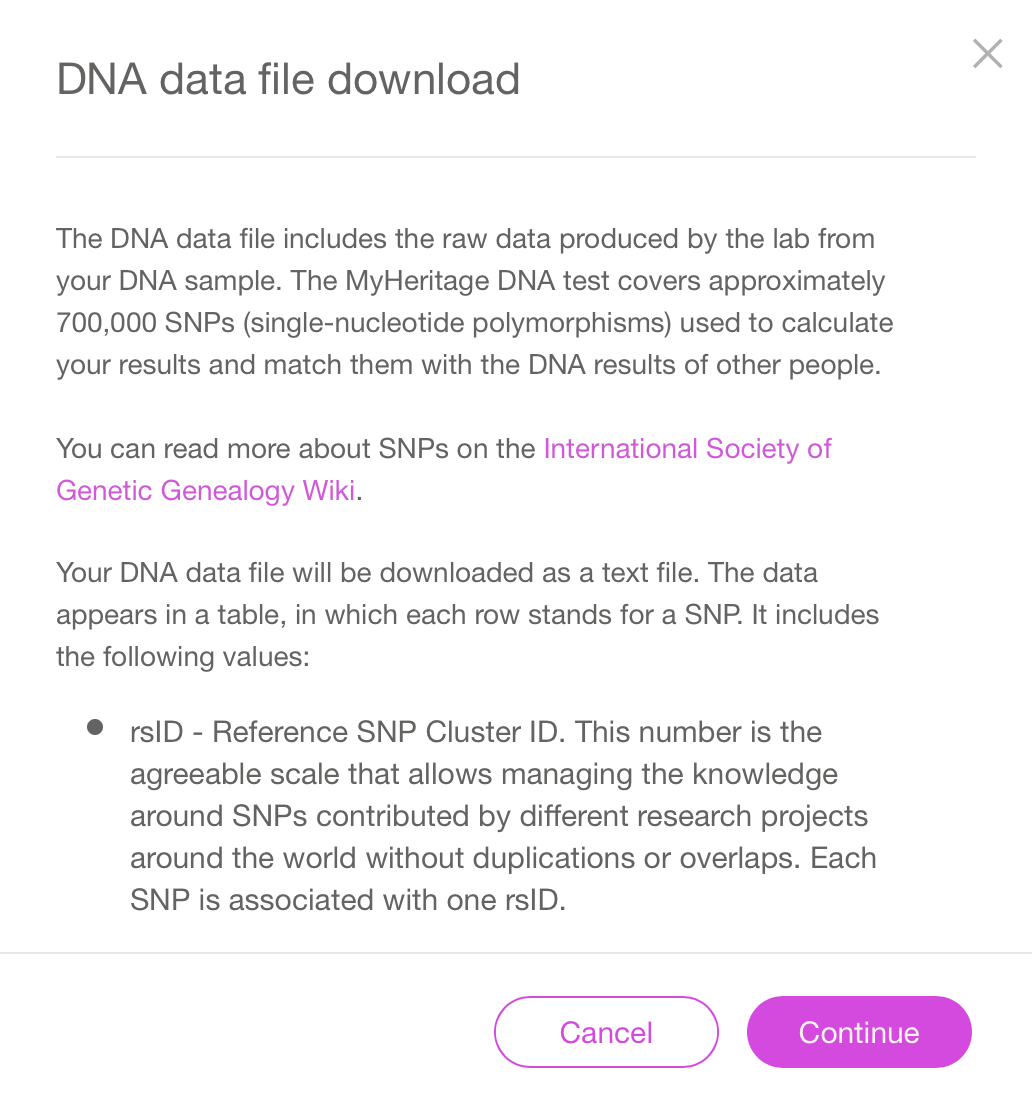
STEP (3): Read through the information about your DNA download and click “Continue”.
STEP (4): Read the terms, check the tick box and click “Continue”. And that's it, you will shortly receive an email from which you can download your raw DNA data.
My Heritage is one of the websites that accepts uploads from elsewhere. This means you don't have to pay for a My Heritage DNA test to get My Heritage DNA matches. There is a small fee to unlock some of the DNA tools but this is usually cheaper than the cost of a DNA test.
Which tests can be uploaded to My Heritage?
My Heritage accepts uploads from Ancestry, Family Tree DNA and 23andMe at the time of writing.
The instructions differ slightly depending on whether you already have a My Heritage account.
If you already have a My Heritage account
STEP (1): Log in at My Heritage and click on “Upload DNA Data”.
STEP (2): You should arrive at a screen like that below. Click “Start”. Now skip to STEP (4), below.
If you DO NOT already have a My Heritage account
STEP (1): Click on this link: https://www.myheritage.com/dna/upload
STEP (2): You should arrive at a screen like that below. Click “Start”.
STEP (3): Fill in the form to create your My Heritage account.
For new AND current My Heritage users
STEP (4):
Chose whether you are uploading your own data or a sample for someone else (be sure to have their permission) and enter the required details.
STEP (5): Press continue and work through the various consents required, choosing whether or not to be included in matching.
STEP (6):
Choose your file and wait until the progress screen with the "data being uploaded" message has completed. You should then see a confirmation message:
That’s it, all done! You just have to wait for the file to be processed to see your matches.
(These instructions and screenshots are current at the time of publishing but the exact layout of the screen and where on the page to click may change with time).
Karen Cummings